

Chocolate Tiramisu
Prep Time
20 minutes
Cook Time
10 minutes
Ingredients
- 6 ounces container mascarpone cheese
- 2/3 cup whipping cream
- 1/2 cup sugar
- Chocolate Zabaglione (recipe follows)
- 2 1/2 cups espresso coffee (warmed)
- 24 crisp ladyfinger cookies (recommended: Savoiardi)
- Unsweetened cocoa powder (for garnish)
- Dark chocolate shavings (for garnish)
- 2 tablespoons whipping cream (or heavy cream)
- 1/4 cup semisweet chocolate chips
- 4 large egg yolks
- 1/3 cup sugar
- 1/4 cup dry Marsala
- Pinch salt
For the Tiramisu:
For the Chocolate Zabaglione:
Instructions
- For the Chocolate Zabaglione: Add cream and chocolate to a heavy small saucepan. Cook over medium heat, stirring often, until the chocolate chips are melted and smooth. Set aside and keep warm.
- Whisk the egg yolks, sugar, Marsala, and salt in a large glass bowl until blended. Set the bowl over a saucepan of simmering water, but do not allow the bottom of the bowl to touch the water. Whisk the egg mixture over the simmering water until it is thick and creamy, about 4 minutes. Remove from the heat.
- Using a large rubber spatula, fold the melted chocolate mixture into the egg mixture. Cover and refrigerate to chill completely.
- For the Tiramisu: Place the mascarpone cheese in a large bowl and set aside. With an electric mixer, beat the cream and 1/4 cup of the sugar in a medium bowl until soft peaks form. Fold the whipped cream into the mascarpone. Then fold in the chilled Chocolate Zabaglione. Cover and refrigerate.
- Whisk the warmed espresso and the remaining 1/4 cup of sugar in another medium bowl until blended. Line a 9 1/4 by 5 by 2 3/4-inch metal loaf pan with plastic wrap, allowing the plastic to extend over the sides. Working with 1 cookie at a time, dip 8 cookies into the espresso, and arrange in a single layer side by side over the bottom of the prepared pan.
- Spoon 1/3 of the mascarpone mixture over the cookies to cover. Repeat dipping 8 of the cookies in the espresso and layering the cookies and remaining mascarpone mixture 2 more times. Dip the remaining 8 cookies in the espresso and arrange side by side atop the tiramisu. Press lightly to compact slightly (the last layer will extend above the pan sides). Cover the tiramisu with plastic and refrigerate at least 6 hours.
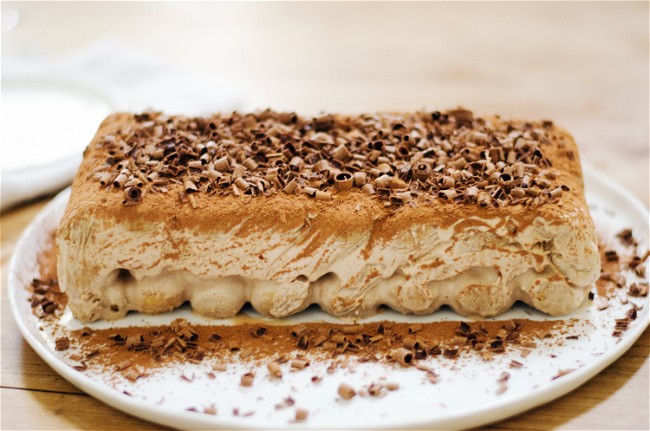
- Unwrap the plastic from atop the tiramisu. Invert the tiramisu onto a platter. Remove the plastic. Sift the cocoa over the tiramisu, and with a vegetable peeler or sharp knife, make dark chocolate shavings and sprinkle over top.


2 comments
Sorry for any confusion! It is just 3 layers of ladyfingers, like in the recipe pic, so you got it right!
I just put this together for tonight! Just a little confused on the ladyfinger quantity. The package I had includes 24 – which is perfect for what the recipe calls for, but…the recipe instructions seems to start & end with ladyfingers. If you are layering the filling in thirds – it seems like you will need a total of 4 layers of ladyfingers so you are eight short to complete dessert!! I decided to only use three layers this time but would like some clarification for next time. Thanks!